They cost only a few Cents per base.
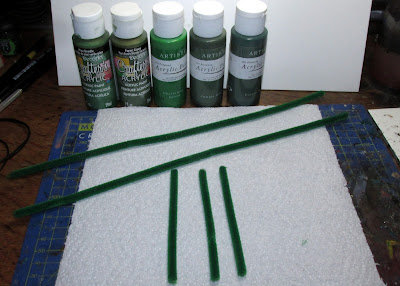
Cut the pipe cleaners down to a fingertip larger that the bottle of craft paint. These craft paint bottles are the exact right size for the project- a pipe cleaner will split into three with the fingertip left over, as well as having the right size nozzle in the lid.
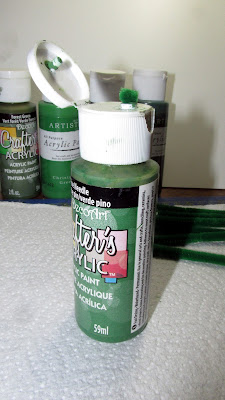
Insert the pipe cleaner into the bottle of craft paint through the lids small hole.
Push the pipe cleaner all the way to the bottom. The fingertip size left over is so you can pull it out again with out getting mucky, as well marking what will be the top of the trees. When its at the bottom of the bottle, with your finger over the top of the hole, give the bottle a shake and a roll, so that the pipe cleaner is heavily coated with paint.
Pull the pipe cleaner out slowly- these bottles have just the right sized hole for this to work- as it comes out, it will pull the excess paint from the pipe cleaner, as well as pulling the bristles all in the same direction- this will help hide the wire inside, as well as help give the pipe a tree like shape.
I used 5 different shades of green for this one. I'd normally use two or three, but I can no longer get the original two colours here, I brought them over from the UK, so I thought I'd try my new shades as well as adding some of the old colours, to help blend this with my older woodland terrain.
Leave the pipes to dry overnight. Make sure to keep the pipes in order of the paint colours, as you will need to return to the original paint again later.
After drying overnight, cut the the pipes down further into 3-4 more sections. I use a heavy pair of kitchen scissors for this, as the wire can be tough to cut through with craft scissors. My personal preference is to cut the lighter, bright green in to the small trees to indicate 'newer' trees and the darker olive colours in to the larger sections. I dont make too many of the smallest '4 section' trees as I only use some on the outside of the base for smaller new trees. I mostly make larger, dark trees.
Snip off the tip of the top end of the pipe cleaners at angles, to give them tree shapes. The top end will be the end that was facing the fingertip part from the start- the pipe cleaner will have the bristles in the right direction then. You can add cuts up and down the tree as you see fit, until you have a tree shape you are happy with. Cut the bottom of the tree dead flat but dont cut anything away from it, you will need the whole piece to connect it to the base.
When you are happy with your trees, and they are as tree shaped as you can get them, then add a dab of the original colour to the tip where you cut the them at an angle. This is too cover the wire from showing though, as well as fixing the bristles in place. Depending on you pipe cleaners, you may need to add glue. Very cheap pipe cleaners can come apart when cut, and this is too hold the bristles in place. These pipe cleaners are from hobbycraft (in the UK) and the dab of paint is enough to hold them together solidly. When adding the paint, pull the brush down to blend the heavy dab at the top into the bristles going down. Leave to completely dry. An hour or two is best.
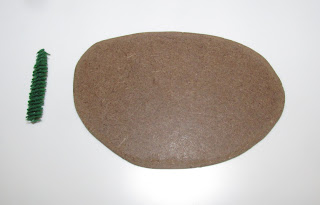
Cut a base out to the size you want. I used the chip board backing to a cheap photoframe from my local pound shop, as I dont seem to be able to get huge sheets of it locally. One frame can give you about 5-10 bases, its a little more costly this way, but this stuff is easy to work with, and still only €1.50. I trim the edge down a little so its sits a little nicer on the table, sand the edges down, so there is no areas where the board is splitting apart. I lightly sand the top to help the glue stick.
I cut a light 'X' shape in to the bottom. I have read that this will help stop with warping, but I'm not sure if this is true or not, but since it did not warp, I have to believe it helped!
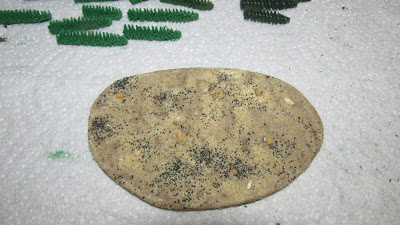
I add a layer of tacky glue (less water and dries faster than regular PVA). A couple of small fish tank stones, a very small amount of the black ballast I use on my mini bases, and finish it off with the cheap, fine bird cage grit. I leave it to dry for a few hours.
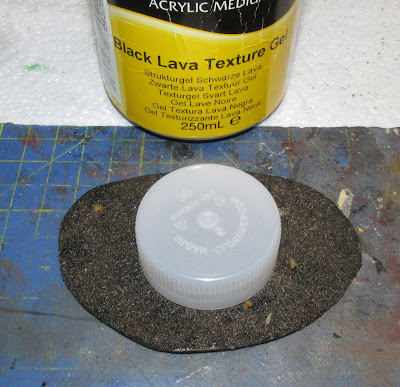
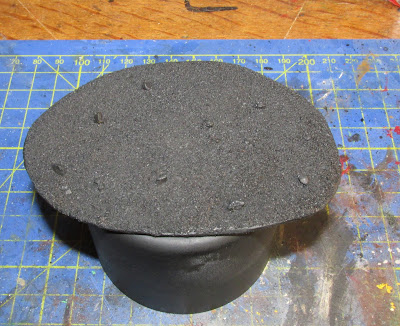
When completely dry I add a black sand wash to seal the sand (instructions on how to make sand wash can be found here on my paint annotations page ) then I use a milkshake cap and a heavy item (in this case the black lava gel from my desk) to help weight the base down to stop any warping while it dries. Make sure that what ever you place on top of the cap wont fall off, or if it does it wont spill every where!
When the wash is dry the base is given a black undercoat. You could skip this step and proceed straight to the next, but I like the overall tone that working from black gives.
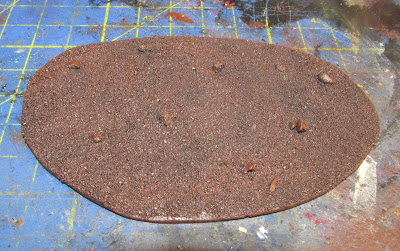
A heavy 'wetbrush' of Brown is done all over. I used vallejo 984 Flat Brown. Wetbrushing is similar to drybrushing but you leave more paint on the brush, rather than wiping it all off. I find the best amount is to soak the brush, wipe most of it away, then run it through the thinnest edge of paint on the pallet again. This is a pretty heavy coat, but make sure its uneven. You want sections of the black to show through, especially more towards the centre where the trees will be places.
I give the base a heavy and uneven coat of agrax earthshade. You could use any brown wash, or even skip this step. I like to included it, even though most of the base will be covered, as it adds some nice shade to the stones- where trees wont be placed, as well as adding some more shades of brown to ground, brown can look flat if its all the same shade. Give it a good hour to dry.
Drybrush the final colours to the base. I changed my usual scheme here, and went for new colours, as I'm trying to add a few more colours to my painting. I did random patches of Vallejo 977 Desert yellow, then did the rest of the gaps and stones with Citadels Rakarth Flesh. I made sure that I went over the edges of both colours again with the opposite colour to blend them together so there were no unnatural straight edges.
Take your pile of nicely cut trees and a tube of cheap superglue. Add some super glue to a pallet or scrap of plastic (never our glue straight on to the trees they will soak it up before you know it and you will glue yourself to them!) Dunk the bottom of the tree into the glue and add to the base. You may need to cut the bottom of the tree flat before soaking it if you did not so so earlier, or its a bit bumpy if any of the threads have gotten loose! The glue will soak in to the tree, you want the whole bottom section to be coated, but dont go mad or it will soak through to the outside, and give your trees a solid glossy look! Very slightly more than you usually would glue something is the best, as the glue will soak in to the tree and still needs to get in between the sand on the base!
I add the larger trees in near the centre and the smaller bright green trees towards the edge, to give the impression of a forest growing outwards. I dont stick to this though, and I try to place the trees as randomly as I can to make it as organic looking. I avoid placing trees on the stones as they will glue uneven and would eventually break off.
Keep going till you are happy with the placement of the trees. You may find that one or two stray strands need fixing up as you go, especially if you are making them in bulk- one always escapes! just even them out with the scissors. I find that they look more natural 'in the flesh' so to speak. The camera picks up on the painted look to them, and under natural light the cuts and paint will look a lot smoother! They are also not so bright! I edited the colours a little to make sure the pictures were nice and clear, but it made the greens a lot brighter than they are! I had about half again in trees left over from the original pipe cleaners, which I'm saving to add to a later project.
So there you have it! Cheap, cheap trees that can be made in bulk very quickly! Adding snow is easy- just add it around the base, and drybrush your mixture onto the trees from the top down.
They take to drybrushing well (they are solid enough once the the paint is totally dry) if you wanted to add a highlight colour to them and you could add additional flock(s) to them by spraying them with cheap hairspray and sprinkling it on, remembering to spray again to seal the flock after.
You do have to mind sleeves on them- they are still bendy in the middle, and catching them wrong can bend them, but its simple to bend them back in shape! If they do snap off, just cut the bottom flat again and re-glue! (I've made about 500 of these so far and I've only ever had two snap off- one from general use, and one during a big house move! So they are pretty sturdy!)





Comments
Post a Comment